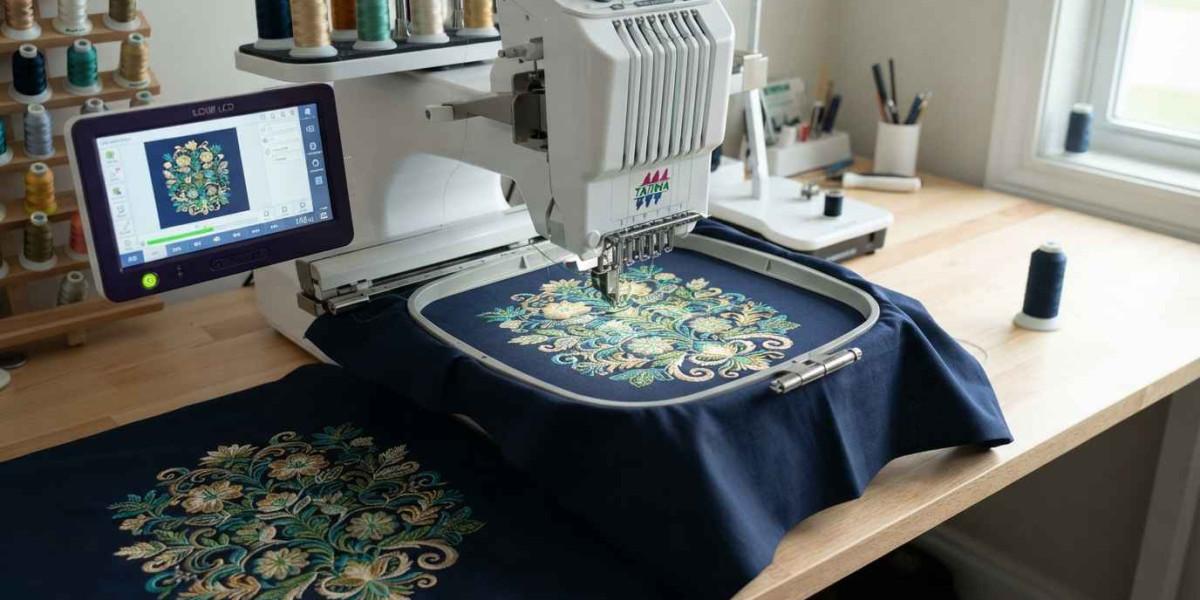

A company logo embroidered on a uniform, cap, jacket, or promotional product represents the business behind it. Uneven lettering, loose stitches, distorted shapes, or inconsistent thread coverage can affect the appearance of the finished item. Professional embroidery designs help address these challenges by adapting artwork to the physical requirements of machine stitching.
Unlike a standard digital image, an embroidery design contains stitch instructions that guide the machine through the logo's shapes, lettering, colors, and outlines. The way these instructions are prepared affects the final appearance, production efficiency, and suitability of the design for different fabrics.
Whether you are producing branded uniforms, corporate apparel, embroidered caps, or custom patches, the quality of the digitized design plays an important role in the result. This guide explains how professional embroidery designs improve logo stitching quality and which factors businesses should consider before ordering a digitized logo.
What Are Professional Embroidery Designs for Logos?
Professional embroidery designs are machine-ready files created by converting artwork into embroidery instructions. These instructions define stitch types, stitch direction, density, underlay, color changes, and stitching order.
A logo file in JPG or PNG format shows the visual design, but it does not contain the information required to operate an embroidery machine. The artwork must be digitized to create a stitch file that the intended machine can read.
Logo digitizing also involves more than tracing the original artwork. A digitizer must consider how thread behaves on fabric, how small details will reproduce, and how the design should be arranged for efficient stitching.
For example, a logo with narrow letters and fine outlines may require adjustments before it can be embroidered at a small chest size. Professional preparation helps preserve the logo's recognizable features while making the design practical for machine production.
1. Improves Lettering Clarity
Lettering is often one of the most challenging parts of an embroidered logo. Small text, narrow fonts, tight spacing, and decorative letter shapes can become difficult to read when converted into stitches.
Professional embroidery designs account for these limitations during digitizing. Letter spacing, stitch direction, column width, and overall dimensions can be adjusted to help keep the text legible.
For example, a business name embroidered on a left-chest logo may need wider spacing than the same text displayed on a printed business card. The physical thickness of thread can cause narrow gaps to close if the design is not prepared appropriately.
The best approach depends on the font, fabric, and finished size. In some cases, increasing the logo dimensions or simplifying a small slogan can produce a more readable result.
2. Creates More Consistent Stitch Coverage
Uneven coverage can leave fabric visible between stitches or make certain areas appear heavier than others. These problems may occur when stitch density, underlay, or stitch direction is unsuitable for the design.
Professional digitizing considers how each section should be filled and how the stitches will interact with the fabric. Density settings are selected according to the stitch type, material, and dimensions rather than applying the same settings throughout the entire logo.
For instance, a large filled symbol may require a different stitch arrangement from a narrow letter or curved outline. Correct settings help create balanced coverage without adding unnecessary thread.
Too many stitches can make embroidery stiff, increase thread breaks, and place excess stress on the fabric. Too few stitches can leave unwanted gaps. The objective is suitable coverage for the specific application.
3. Preserves the Logo's Shape and Proportions
A business logo may contain circles, curves, sharp corners, thin outlines, or several adjoining shapes. If these elements are digitized poorly, they may appear uneven or distorted after stitching.
Professional embroidery designs use appropriate stitch paths and account for fabric movement during embroidery. Pull compensation may be applied where needed to help counter the tendency of stitches to pull fabric inward.
This is particularly important for geometric logos, circular emblems, and designs with small spaces between letters or shapes.
The original artwork should guide the digitizing process, but some technical adjustments may be necessary to maintain its appearance in thread. A carefully prepared file helps retain the logo's important visual features while accommodating the limitations of the chosen material.
4. Uses Appropriate Stitch Types for Different Elements
Not every part of a logo should be stitched in the same way. Running stitches, satin stitches, and fill stitches each serve different purposes.
Running stitches are often used for fine lines, light details, and selected outlines. Satin stitches are suitable for many narrow columns and lettering, while fill stitches are commonly used for larger areas that need broad coverage.
A professional digitizer selects stitch types according to the shape, dimensions, and intended appearance of each element. Using an unsuitable stitch type may create bulky sections, weak coverage, or poor detail reproduction.
The correct combination can improve texture, definition, and consistency across the logo. It also helps prevent the stitch structure from becoming unnecessarily complicated.
5. Reduces Fabric Puckering and Distortion
Fabric puckering occurs when material gathers or wrinkles around the embroidery. It can result from several factors, including excessive stitch density, insufficient stabilization, incorrect hooping, fabric movement, or unsuitable digitizing settings.
Professional embroidery designs can help reduce design-related causes by using appropriate density, underlay, stitch direction, and sequencing.
However, digitizing alone cannot prevent every puckering problem. The fabric, stabilizer, needle, thread tension, and machine setup also influence the final result.
For example, a stretchy polo shirt may require more stabilization than a firm woven garment. A design intended for a structured cap may need a stitch plan suited to the cap's shape and construction.
The best results come from matching the digitized logo to the actual material and testing it before production.
6. Improves Outline Definition and Edge Quality
Logo outlines help define letters, symbols, and color boundaries. If the outline stitches are poorly planned, the finished design may contain uneven edges, visible gaps, or inconsistent borders.
Professional digitizing considers the relationship between adjoining shapes and outlines. Stitch direction, underlay, overlap, and pull compensation may need adjustment to account for the fabric's response during stitching.
For example, a logo with a dark border around a light-colored symbol may need careful planning where the two sections meet. If the adjoining stitch areas are not prepared correctly, the border may appear irregular or the fabric may show through.
Inspecting the edges during a sample stitch-out can reveal problems that are difficult to identify from an on-screen preview alone.
7. Supports Consistent Results Across Multiple Garments
Businesses often need the same logo embroidered on dozens or hundreds of items. The design should remain consistent across different production runs, provided the machine setup and materials are suitable.
A properly prepared embroidery file provides a repeatable stitch sequence and defined design structure. This gives operators a consistent starting point when producing uniforms, team apparel, promotional clothing, and branded merchandise.
For the best results, businesses should also document the thread colors, garment type, stabilizer, needle, and other relevant machine settings used during successful production.
If the same logo will be stitched on very different materials, one file may not provide the best result in every situation. A cap version, for example, may require different preparation from a flat logo intended for a T-shirt.
8. Helps Manage Thread Changes and Production Time
The way a logo is digitized affects machine movement, thread changes, trimming, and the overall stitch sequence. Poor sequencing can lead to unnecessary stops, long jump stitches, and additional production work.
Professional digitizing organizes the design to reduce avoidable machine movement while maintaining the intended appearance. Related areas may be stitched in a logical order, and color changes can be arranged to suit the design.
Production time also depends on the stitch count, machine speed, garment handling, and the number of color changes. A design with many small details may naturally require more time than a simple one-color logo.
The aim is not merely to reduce stitch count. Removing too many stitches can compromise coverage or detail. A good design balances appearance, durability, and practical production requirements.
9. Adapts Logos for Different Garments and Products
A logo may be used on caps, polo shirts, jackets, bags, towels, and patches. Each application presents different stitching conditions.
A cap has a curved, structured surface, while a T-shirt may stretch during handling. A jacket may be thick or contain multiple layers, and a towel has a raised surface that can hide fine details.
Professional embroidery designs take the intended application into account. Depending on the material and placement, the digitizer may need to modify density, underlay, stitch direction, lettering, or dimensions.
This is why simply using the same logo file everywhere may not produce consistent results. Tell your digitizer where the logo will be stitched and whether separate versions are needed for different products.
10. Makes Testing and Quality Control More Effective
A digital preview helps show the approximate appearance of an embroidered logo, but it cannot reproduce every physical effect of stitching. A sample stitch-out is useful for evaluating the design on the intended material.
During testing, check the lettering, shape, coverage, outlines, fabric distortion, thread breaks, and color arrangement. Pay particular attention to small text, narrow spaces, and areas where different stitch sections meet.
If problems appear, review both the digitized file and the machine setup. A gap may result from stitch planning, fabric movement, or tension settings, so identifying the cause is important before making changes.
Once a successful sample has been approved, record the relevant production settings. This helps maintain consistency when the logo is stitched again.
Common Logo Stitching Problems and Their Causes
Even a high-quality source logo can produce disappointing results if the digitized file or production setup is unsuitable.
| Problem | Possible cause |
|---|---|
| Unreadable small text | Lettering is too small, spacing is too tight, or strokes are too narrow |
| Fabric showing through | Insufficient coverage or unsuitable stitch settings |
| Puckering around the logo | Stabilization, hooping, density, or tension issues |
| Uneven outlines | Poor stitch planning, fabric movement, or incorrect compensation |
| Excessive thread breaks | Density, needle, thread, or machine setup problems |
| Distorted shapes | Inadequate adjustments for fabric pull or an unsuitable design size |
These are possible causes rather than definitive diagnoses. Reviewing the sample embroidery and production setup helps identify the appropriate correction.
How to Choose Professional Embroidery Designs for Your Logo
When selecting a digitizing service or reviewing an existing logo file, consider the actual requirements of your project rather than relying only on the digital preview.
First, provide clear artwork and specify the final dimensions. Include the garment type, embroidery placement, preferred thread colors, and machine format. If the logo contains small lettering or detailed symbols, ask whether any changes may be needed to preserve readability.
Next, check the provider's experience with similar work. Relevant examples, a clear revision policy, realistic delivery estimates, and a willingness to discuss technical requirements can help you evaluate the service.
Finally, test the file on the intended material before beginning a large order. A successful sample provides a more reliable assessment of stitching quality than an image preview alone.
When Should You Use Professional Logo Digitizing Services?
Professional logo digitizing is particularly useful when a design includes detailed symbols, multiple colors, small lettering, curved outlines, or elements that must be reproduced consistently across garments.
It can also help when preparing logos for commercial embroidery machines, structured caps, large jacket designs, or repeated production orders. A digitizer can evaluate the artwork and prepare stitch instructions suited to the intended application.
Before placing an order, share the original logo, required size, fabric or product type, and target file format. Ask how revisions are handled and whether a sample stitch-out is available.
For businesses that need machine-ready logo files, iDigitize offers embroidery digitizing services to help prepare artwork for machine stitching.
Conclusion
Professional embroidery designs improve logo stitching quality by combining suitable stitch types, balanced density, effective underlay, clear lettering, and carefully planned stitch sequences. These details help preserve the logo's proportions and improve coverage while reducing avoidable production problems.
The final result also depends on fabric selection, stabilization, machine settings, and sample testing. Businesses should provide accurate artwork and clear instructions, then evaluate the design on the intended material before starting bulk production.
By paying attention to these factors, iDigitize can help businesses prepare embroidery-ready logo files suited to their products and production requirements.
Frequently Asked Questions
Q1. How do professional embroidery designs improve logo quality?
They use planned stitch paths, suitable density, appropriate underlay, and carefully selected stitch types to help produce clear lettering, balanced coverage, and consistent logo shapes.
Q2. Why does logo digitizing matter for embroidery?
Logo digitizing converts visual artwork into machine-readable stitch instructions. It also adapts details to the physical limitations of thread and fabric.
Q3. Can a small business logo be embroidered clearly?
Yes, depending on its size, lettering, fabric, and level of detail. Small text or thin lines may need adjustment to remain readable after stitching.
Q4. What file formats are commonly used for embroidered logos?
DST, PES, JEF, EXP, HUS, and VP3 are common embroidery formats. The correct choice depends on the machine and its supported file types.
Q5. Why does an embroidered logo look different from the original artwork?
Thread thickness, fabric movement, stitch direction, and the limitations of embroidery can affect the appearance. Some details may need to be simplified or adjusted during digitizing.
Q6. Can one logo embroidery file be used on caps and shirts?
Sometimes, but the best settings may differ because caps and shirts have different shapes and fabric characteristics. Separate versions may be appropriate for reliable results.
Q7. Should I test a digitized logo before bulk production?
Yes. A sample stitch-out helps identify problems with lettering, coverage, outlines, alignment, and fabric distortion before the design is used on multiple garments.