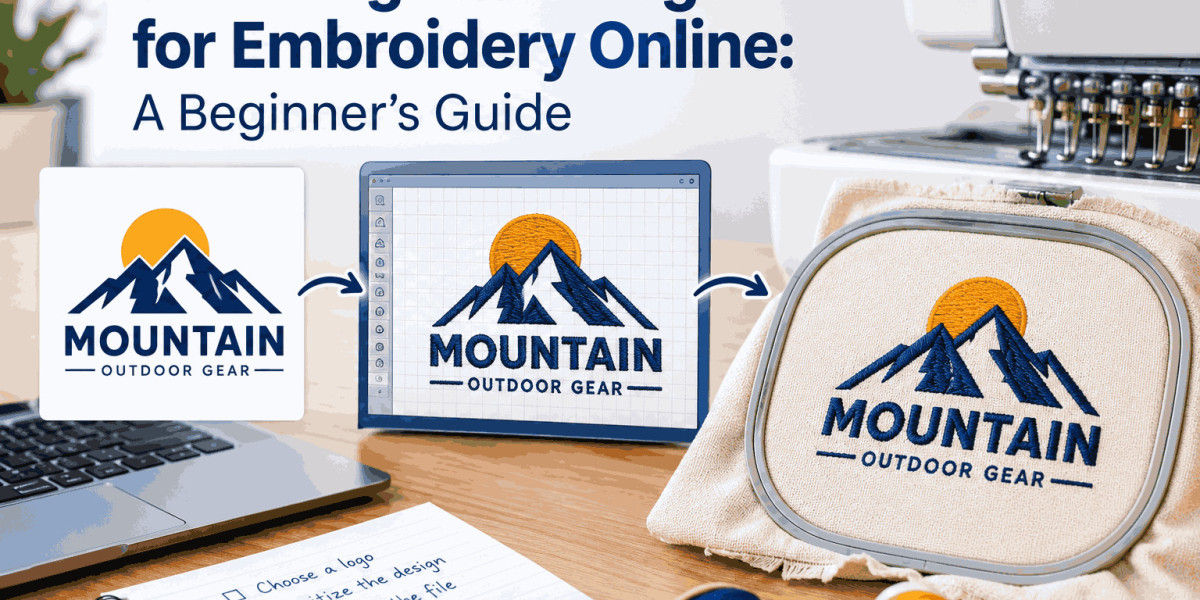

Turning a business logo into an embroidery design is different from simply uploading an image to an embroidery machine. A JPG, PNG, or other image file must first be converted into a stitch-based embroidery file that the machine can read.
For beginners, digitize a logo for embroidery online may sound complicated, but understanding the basic process makes it much easier to prepare artwork correctly. The quality of the final embroidery depends on the logo, fabric, design size, stitch types, thread selection, and digitizing settings.
This guide explains how online embroidery digitizing works, what you need before starting, and how to check the final embroidery file before production.
What Does It Mean to Digitize a Logo for Embroidery?
Embroidery machines do not normally stitch ordinary JPG or PNG images directly. They require specialized embroidery files containing instructions about where the needle should move, which stitch types to use, and how the design should be built.
Digitizing converts artwork into a sequence of stitches.
During this process, a digitizer decides:
- Where stitches should begin and end
- Which areas require fill stitches
- Where satin stitches should be used
- How outlines should be created
- Which colors should be assigned
- What stitch direction each area needs
- How different sections should connect
The final file can then be saved in an embroidery machine format such as DST, PES, JEF, or another format supported by the machine.
Why Can't You Simply Upload a Logo?
A digital logo and an embroidery design are two different types of artwork.
A logo may contain gradients, very thin lines, tiny text, shadows, and other details that work well on a screen but cannot be reproduced effectively with thread.
Embroidery has physical limitations. Thread has thickness, fabric stretches, and very small design elements may merge or disappear when stitched.
Digitizing therefore involves adapting the artwork for the embroidery process rather than simply converting its file extension.
What Do You Need Before Digitizing a Logo?
Start with the best version of the logo available.
A clear vector file such as AI, EPS, or SVG can provide useful information about shapes and colors. High-resolution PNG or JPG artwork can also be used when vector artwork is unavailable.
You should also know where the logo will be embroidered.
For example, a logo intended for a left-chest shirt may require different design decisions from a large jacket-back logo or a cap design.
Important information includes:
- Original logo artwork
- Final embroidery size
- Garment or fabric type
- Preferred thread colors
- Embroidery machine format
- Placement of the design
- Any specific production requirements
Step 1: Prepare the Logo Artwork
Before digitizing, inspect the logo and remove unnecessary elements.
Look at the text, outlines, shapes, colors, and small details. Determine which elements are essential to the identity of the logo and which may need modification for embroidery.
If the source file contains a complicated background, remove it where appropriate.
A clean source image gives the digitizer a better reference and can make the process more efficient.
Step 2: Choose the Final Embroidery Size
Design size has a major effect on digitizing.
A logo that looks clear at 8 inches wide may become difficult to read at 2 inches. Small text, narrow gaps, and thin lines can become problematic when reduced.
Before digitizing, decide the approximate finished size.
The digitizer can then adjust stitch types, density, underlay, and other settings for that specific size.
Step 3: Select the Right Stitch Types
Different parts of a logo require different stitch structures.
Satin Stitch
Satin stitches are commonly used for borders, lettering, and narrow shapes where a smooth stitched surface is appropriate.
Fill Stitch
Fill stitches are useful for larger areas of a design. The stitch direction and density need to be selected according to the shape and fabric.
Running Stitch
Running stitches can be used for fine outlines, details, and narrow lines where a heavier stitch structure is not appropriate.
The correct combination depends on the artwork and the final embroidery size.
Step 4: Plan Stitch Direction
Stitch direction affects both appearance and stability.
Different areas of the logo may require different stitch angles to create a consistent embroidered appearance. Changing stitch direction can also help define shapes and prevent large areas from looking flat.
An experienced digitizer considers the shape of each object rather than applying the same direction to the entire logo.
Step 5: Add Appropriate Underlay
Underlay stitches are placed beneath the main stitches to help stabilize the fabric and support the top layer of embroidery.
The correct underlay depends on factors such as fabric type, design size, and stitch structure.
Too little support can contribute to poor coverage or shifting. Too much can make the design unnecessarily dense.
This is one reason embroidery digitizing requires knowledge of how thread behaves on different materials.
Step 6: Set Stitch Density Carefully
Stitch density refers to how closely stitches are placed within a particular area.
If the density is too low, the fabric may show through the design. If it is too high, the design can become stiff, bulky, or difficult for the machine to sew.
The appropriate density depends on the fabric, thread, stitch type, design size, and other production factors.
There is no single density value that works perfectly for every logo.
Step 7: Consider Thread and Color Changes
A logo may contain several colors, and each color can require a separate thread.
The digitizing sequence should be planned carefully so the machine can move logically through the design while minimizing unnecessary color changes and jumps.
Thread colors should also be selected with the actual embroidery material in mind because thread appearance can vary depending on the fabric and lighting.
Step 8: Choose the Correct Embroidery File Format
Different embroidery machines use different file formats.
Some common formats include:
- DST
- PES
- JEF
- EXP
- HUS
Before ordering or exporting the design, confirm the format required by your embroidery machine.
The same digitized design may need to be exported into a compatible machine format before production.
Step 9: Review the Digitized Design
Before stitching the design, inspect the embroidery file carefully.
Many digitizing programs provide a simulation that shows the expected stitch sequence.
Look for:
- Unnecessary jumps
- Excessive density
- Small unreadable details
- Incorrect stitch directions
- Poor sequencing
- Unexpected gaps
- Incorrect color order
A simulation can identify potential issues before thread and fabric are used.
Step 10: Test Stitch the Design
A test stitch is one of the most useful quality checks.
Even if a design looks correct in embroidery software, fabric can behave differently during actual stitching. Stretch, thickness, texture, and stabilization can all influence the result.
Whenever possible, test the design on the same or a similar fabric that will be used for the final product.
If problems appear, the digitized file may need adjustments before production.
How to Digitize a Logo for Embroidery Online
Online embroidery digitizing services can simplify the process for beginners.
Instead of learning professional digitizing software from scratch, you can submit your artwork and provide information about the desired size, fabric, placement, and machine format.
A typical online workflow may involve:
- Uploading your logo.
- Providing the desired embroidery size.
- Selecting or specifying the required file format.
- Sharing fabric or garment information.
- Requesting the digitizing service.
- Reviewing the completed embroidery file.
- Test stitching the design before production.
The exact process varies between service providers, so always check what information they require before submitting the artwork.
What Makes a Good Embroidery Digitizing Service?
When choosing an online service, look beyond turnaround time and price.
Consider whether the service provides information about its digitizing process, file formats, revisions, quality checks, and experience with different types of embroidery.
A reliable service should also understand that a design for a cap may require different treatment from one intended for a jacket, polo shirt, or flat garment.
It can also be useful to review examples of completed embroidery work rather than judging quality from the original artwork alone.
Common Logo Digitizing Problems for Beginners
Beginners may encounter several problems when converting logos into embroidery designs.
Small Text Becomes Unreadable
Very small lettering may not translate well into stitches. In some cases, the text needs to be enlarged, simplified, or adjusted.
Thin Lines Disappear
Extremely thin lines may not provide enough space for reliable stitching. The digitizer may need to modify their width while preserving the overall appearance.
Too Many Stitches
Adding excessive stitches does not necessarily improve quality. It can increase bulk, thread usage, sewing time, and fabric stress.
Poor Registration
When different design elements do not align correctly, gaps or overlaps can appear. Proper sequencing and compensation can help address this issue.
Fabric Puckering
Puckering can occur when fabric and stitch structures are not properly balanced. Stabilization, density, underlay, and design construction all play a role.
How Fabric Affects Logo Digitizing
The same logo may need different settings depending on the fabric.
A design intended for a structured cap may require different treatment from one stitched on a lightweight polo shirt.
Fleece, denim, cotton, performance fabrics, jackets, caps, and other materials behave differently during embroidery.
For this reason, providing accurate fabric information when ordering an online digitizing service can help the digitizer prepare the design more appropriately.
Why Logo Size Matters So Much
One of the biggest mistakes beginners make is assuming that one embroidery file will work perfectly at every size.
Changing the design size can affect:
- Letter readability
- Stitch density
- Detail visibility
- Underlay
- Stitch length
- Overall stitch count
A design may need adjustments when being produced at significantly different dimensions.
If you need the same logo for a cap, left chest, and large jacket back, it may be better to have versions optimized for those applications rather than simply resizing one file.
Should You Use Automatic Logo Digitizing?
Automatic tools can convert artwork into stitch data, but they may not understand the practical requirements of embroidery as well as an experienced digitizer.
Automatic conversion may create problems with stitch direction, density, sequencing, small details, and fabric compensation.
For very simple designs, automated tools can provide a starting point. For business logos and production work, manual review and refinement are important.
How to Prepare Your Logo for Online Digitizing
Before submitting artwork, provide the clearest source file available.
If possible, include:
- High-resolution artwork
- Vector artwork when available
- Correct logo colors
- Desired finished dimensions
- Garment or fabric type
- Placement information
- Required embroidery format
Also mention any details that must remain unchanged.
Clear instructions reduce the chance of misunderstandings and help the digitizer make appropriate production decisions.
Frequently Asked Questions
Q1. Can I digitize a logo for embroidery online?
Yes. Many embroidery digitizing services allow customers to upload logo artwork online and receive a machine-ready embroidery file.
Q2. What file should I upload for logo digitizing?
A clear vector file such as AI, EPS, or SVG is useful when available. High-resolution PNG and JPG files can also be used for many digitizing projects.
Q3. What embroidery format do I need?
The correct format depends on your embroidery machine. Common formats include DST, PES, JEF, EXP, and HUS.
Q4. How long does logo digitizing take?
Turnaround time varies by service provider and design complexity. Simple logos generally require less work than detailed designs with many colors and small elements.
Q5. Can any logo be embroidered?
Most logos can be adapted for embroidery, but some details may need modification. Very small text, thin lines, gradients, and intricate details may need to be simplified.
Q6. Do I need to test the embroidery file?
Yes. A test stitch can reveal problems that may not be obvious in digitizing software. Testing on the intended or a similar fabric is particularly useful.
Conclusion
Learning how to digitize a logo for embroidery online starts with understanding that embroidery is a physical production process rather than simply another image format. The artwork must be converted into carefully planned stitches that work with the design size, fabric, thread, and embroidery machine.
For beginners, providing clear artwork and accurate production information is an important first step. A properly prepared digitized file should then be reviewed and test stitched before full production.
When professional logo digitizing is needed, iDigitize can help convert business artwork into embroidery-ready files prepared for different garments, fabrics, and machine formats.